
Showing posts with label Drone. Show all posts
Showing posts with label Drone. Show all posts
Friday, November 18, 2016


Tuesday, March 8, 2016
Removable Bumpers and Sour Beers
Josh and Tim requested removable bumpers on the mini quad. This would serve two purposes, first it will allow us to remove broken bumpers and replace them, instead of replacing the whole frame. Second, we will be able to remove the bumpers which weigh 2 grams each for a total of 8 grams! This should help the flight time when we are racing.
Amy came up with the idea for how to slide the bumpers on, she's wicked smaht. Seriously though she came up with it in about a second.
Take a look below.


Pretty excited to try them out. Undoubtedly they will need some tweaking since they feel like if they are hit hard from the side they will likely pop off.
Now onto my second hobby. HOMEBREWING! I have decided to start trying to brew sour beers. Amy and I love Goses and most sour beers. I tried brewing a Gose a few weeks ago, but it did not get very sour, which was quite sad. Talking with a helpful guy at the brew store I discovered I had used the wrong bacteria, I need lactobacillus brevis in order to get the big sour flavor we like. Now in order to keep the bacteria happy during the first 3-4 days the wort needs to stay between 90F and 120F. This is pretty hard when it is winter in Boston. So I am making an immersion heater. Bascially you put the fermenting bucket in a larger bucket and then use a water heating coil with a temperature controller. I added a water pump in order to circulate the water.
Here are some pictures of my test setup.


The temperature controller has a thermistor which is also in the bucket. This allows it to sense the temperature of the water control the heating coil/pump.
Seems to be working well so far, I am excited to try it out this weekend when I start my sour beer.
Amy came up with the idea for how to slide the bumpers on, she's wicked smaht. Seriously though she came up with it in about a second.
Take a look below.


Pretty excited to try them out. Undoubtedly they will need some tweaking since they feel like if they are hit hard from the side they will likely pop off.
Now onto my second hobby. HOMEBREWING! I have decided to start trying to brew sour beers. Amy and I love Goses and most sour beers. I tried brewing a Gose a few weeks ago, but it did not get very sour, which was quite sad. Talking with a helpful guy at the brew store I discovered I had used the wrong bacteria, I need lactobacillus brevis in order to get the big sour flavor we like. Now in order to keep the bacteria happy during the first 3-4 days the wort needs to stay between 90F and 120F. This is pretty hard when it is winter in Boston. So I am making an immersion heater. Bascially you put the fermenting bucket in a larger bucket and then use a water heating coil with a temperature controller. I added a water pump in order to circulate the water.
Here are some pictures of my test setup.
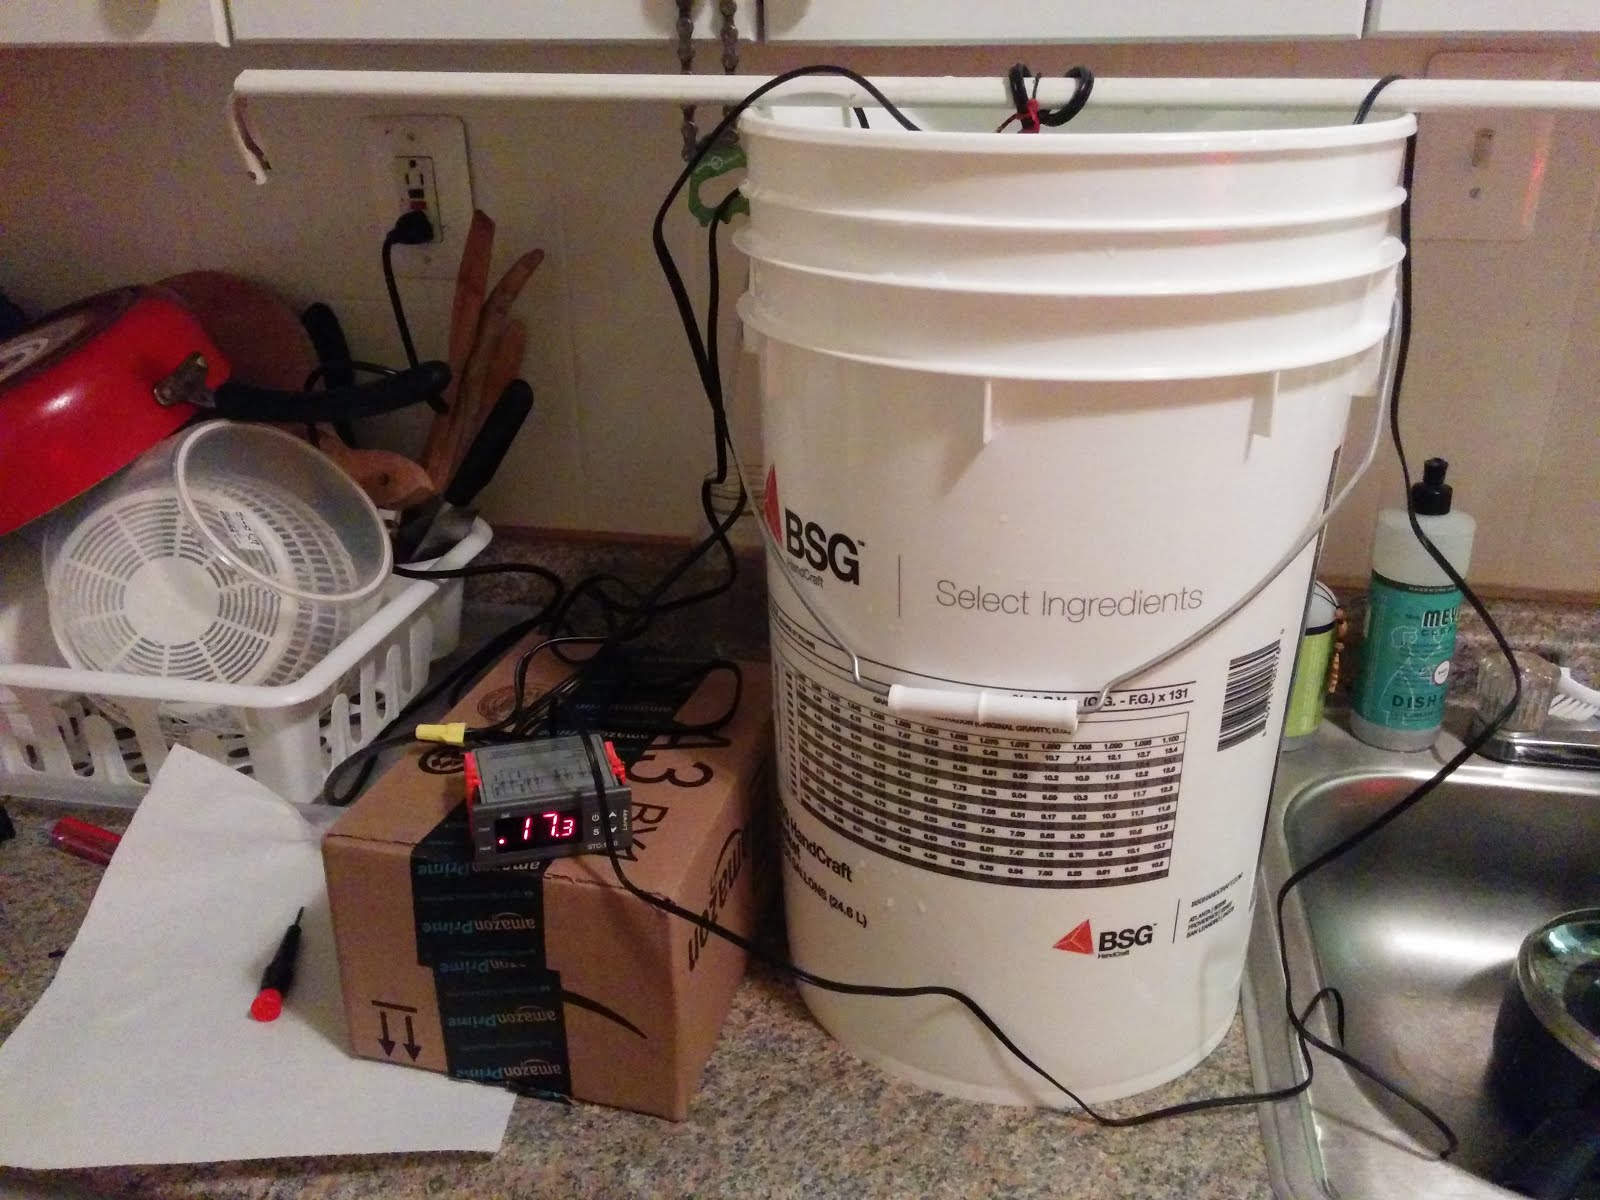
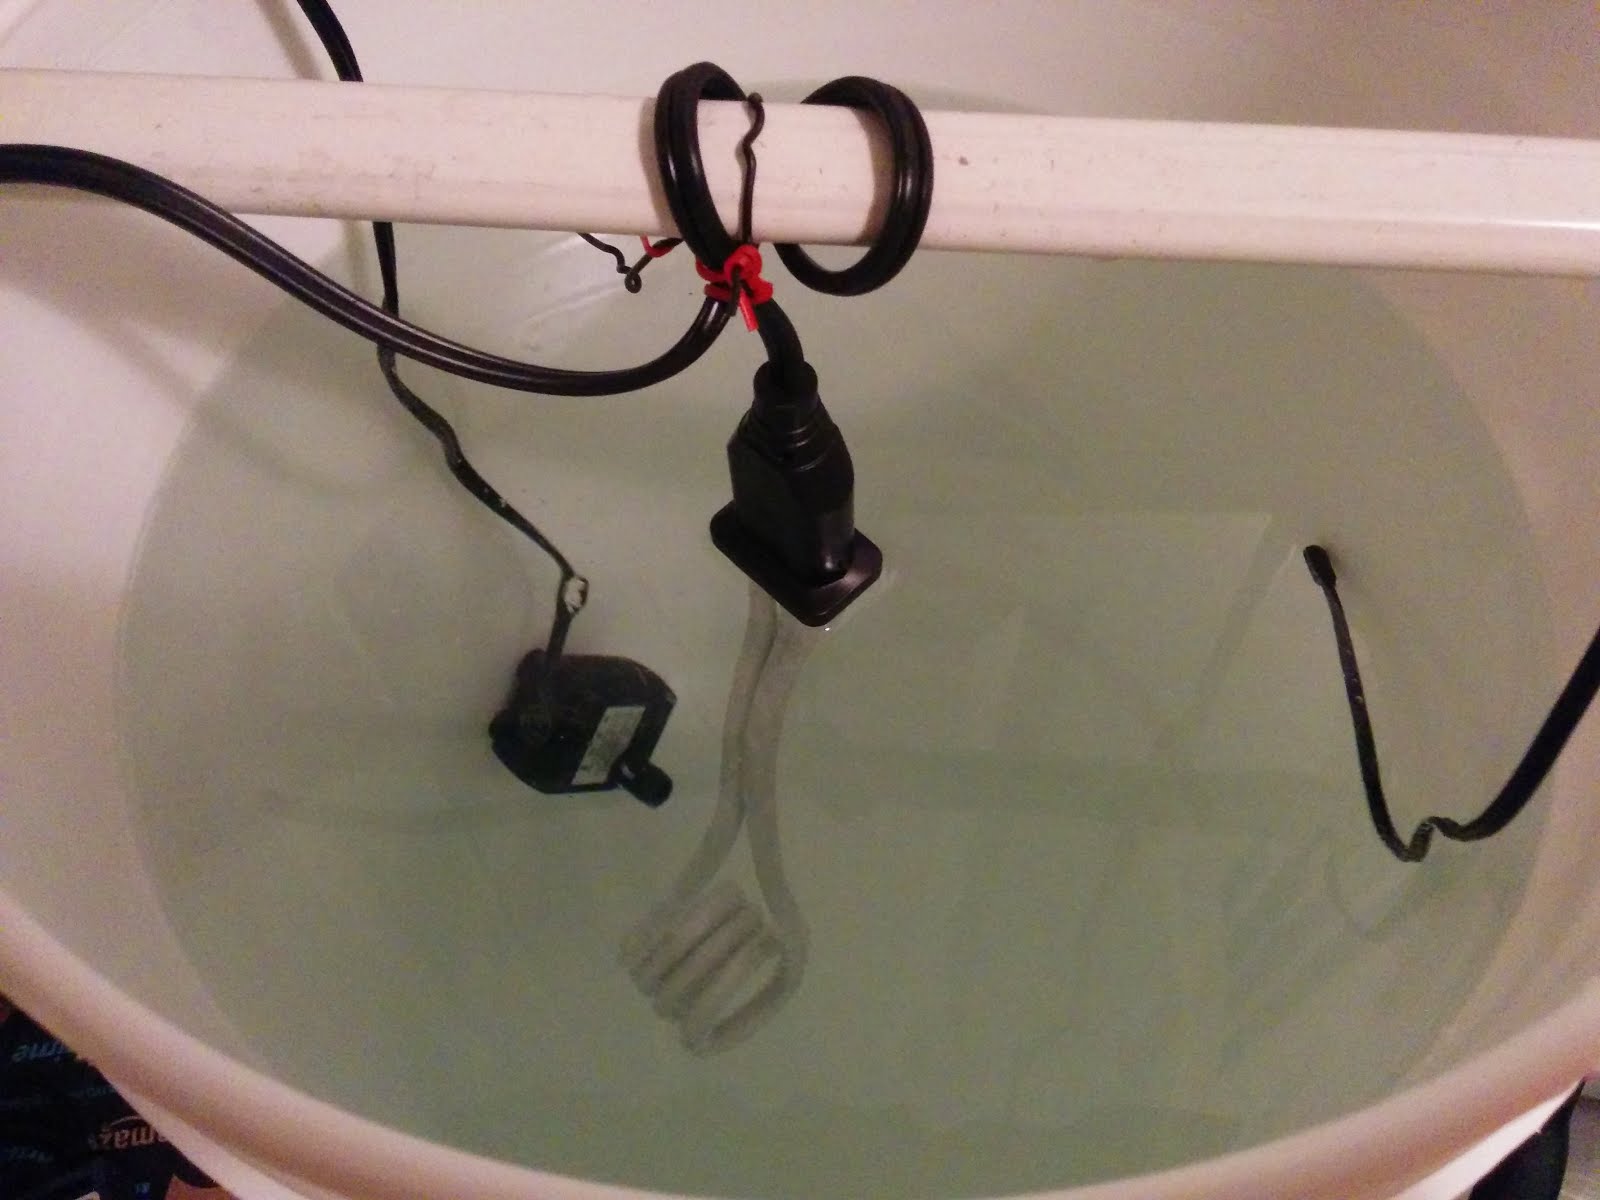
The temperature controller has a thermistor which is also in the bucket. This allows it to sense the temperature of the water control the heating coil/pump.
Seems to be working well so far, I am excited to try it out this weekend when I start my sour beer.
Saturday, February 27, 2016
Mini Update
Josh, Tim, and I got together today and built up our mini quads. Things went fairly well except the micro multiwii FCs from hobbyking are TERRIBLE. Programming them consistently was a challenge, the GUI stinks, Tim's FC won't bind, and to top it off they stop functioning when they get cold. We tried to fly outside in 35F weather, apparently that was too cold since they literally wouldn't communicate with the transmitter, but were fine after being back inside for a few minutes.
So we are looking to upgrade out flight controllers to something more reliable.
Flight Controller (might have them made myself if I can get them cheap and we can solder them)
Orange T-Six Receiver
Taranis x9d Recevier (Need to double check, but this would mean Tim does not need to buy a module for his transmitter)
I was unsure what CPPM was or if the lulfro FC supported it (it says PPM). This forum topic helped clear that up. "It's actually just PPM, CPPM seems to be a name dreamed up just to differentiate PPM output from the Rx on a servo port from the PPM output of the Tx to the module or DSC port.".
Also we could potentially get rid of the video battery since these boards have a filtered regulated output for FPV gear (it is 5V but can be switched to 3.3V)
Last update is the frame got an upgrade and it works pretty well. Still some tweaking to do, but it works well for now.

Wednesday, November 4, 2015
1st Quad Race
Took my lunch break with two of my coworkers yesterday and went over to the field near our work. My coworker Jim had just finished his custom designed quad and was trying it for the first time. Murphies law obviously made an appearance and it took us some time to debug the couple issues that were present. After that his quad had a short flight and then took a hard landing completely breaking the frame. He'll 3D print a new one and be ready to go in no time though.
My other coworker Matt and I decided to have a race on our second battery pack. We did a 3 lap race up and down the field. I had a ton of fun and was surprised how well I was able to keep it low to the ground. I should mention that I decided to change the PI gains around a bit for the second flight and that really helped. I had set them back to default for the first flight and had the same problems with wobble that I had been having. I turned the gains down a bit and wow did it make a difference. Obviously I didn't tune them, but just that little change really helped. I will have to take some time and tune them properly soon. The new PID gains are as follows.

The battery on the bottom of the quad worked out fine and seemed to have no effect on the flight characteristics. Looking forward to another race on Thursday.
My other coworker Matt and I decided to have a race on our second battery pack. We did a 3 lap race up and down the field. I had a ton of fun and was surprised how well I was able to keep it low to the ground. I should mention that I decided to change the PI gains around a bit for the second flight and that really helped. I had set them back to default for the first flight and had the same problems with wobble that I had been having. I turned the gains down a bit and wow did it make a difference. Obviously I didn't tune them, but just that little change really helped. I will have to take some time and tune them properly soon. The new PID gains are as follows.

The battery on the bottom of the quad worked out fine and seemed to have no effect on the flight characteristics. Looking forward to another race on Thursday.
Tuesday, November 3, 2015
Battery Woes
I have not had great luck with batteries recently. My troubles started when I took a hard landing and my rear arm broke resulting in a prop strike to my battery pack, see below.

Next problem I encountered was when I was doing my preflight and discovered that the battery in my transmitter was dead. Apparently the transmitter was switched on in the case and this drained the battery all the way to zero causing it to puff up, see below. At this point both batteries are toast. I had thought that the transmitter had a safety feature that would cut power if the battery got too low, but I guess not.


In order to prevent this in the future I am going to do two things. One, I will relocate the quad battery to the bottom of the quad. Two, I will always unplug the transmitter battery after flying. Looks like I need to write pre-flight and post-flight checklists...
Wednesday, October 14, 2015
More Flights = More Learning Opportunities
Went back to PA for the weekend and got to fly a couple times. I tried flying at my house because some people wanted to see me fly. Against my better judgement I said yes. Besides being a small area, there are a bunch of trees... So as you can imagine it almost ended in disaster. Thankfully the drone gods smiled on me and I somehow flew through a bunch of branches and landed safely. After that I went to my old elementary school, which is now vacant, and got some great flights in.
I am still noticing a wobble when flying, and it is starting to become a problem. So I started adjusting some settings. I first turned down the roll and pitch full through limit to 45 degrees so the sticks wouldn't be so sensitive. Next I adjusted my PID settings. I turned my attitude Kp value down, and set the Ki setting to slightly below it (set rate Ki and Kd to zero). Unfortunately it was really windy tonight when I tried out the new setting and was getting dark so I crashed and it broke my bottom plate, guess I will have to print that part with a higher infill. I'll have to try to tune this when there is no wind. I also noticed that the rear left motor seems to not spin when all the other motors start spinning. This is a problem since the quad wants to flip when it takes off until the motor spins up to the other motors speed.
So basically I've got some adjustments to make. Sounds like my next flight is going to be a lot of short take offs followed by landings for adjustments.
I am still noticing a wobble when flying, and it is starting to become a problem. So I started adjusting some settings. I first turned down the roll and pitch full through limit to 45 degrees so the sticks wouldn't be so sensitive. Next I adjusted my PID settings. I turned my attitude Kp value down, and set the Ki setting to slightly below it (set rate Ki and Kd to zero). Unfortunately it was really windy tonight when I tried out the new setting and was getting dark so I crashed and it broke my bottom plate, guess I will have to print that part with a higher infill. I'll have to try to tune this when there is no wind. I also noticed that the rear left motor seems to not spin when all the other motors start spinning. This is a problem since the quad wants to flip when it takes off until the motor spins up to the other motors speed.
So basically I've got some adjustments to make. Sounds like my next flight is going to be a lot of short take offs followed by landings for adjustments.
Friday, October 9, 2015
Second Flight

Decided to go for a flight on Wednesday after work. Went to a local field (Browning Fields). The weather was great, pretty much zero wind, warm, and sunny. I had two of my props on backwards, oops. I forgot to move the props around with the motors after I changed their mounting orientation. After that quick fix I did a short line of sight flight to make sure nothing else was wrong, with that test passing I set up my FPV gear and started my first flight of the afternoon.
Up until this point I had pretty much only flown FPV in a simulator for about 3 hours, so I had a little experience. My last flight was all line of sight and involved a lot of crashes (the field was also really tiny). So I was a little nervous jumping right into using my FPV goggles, but I am really glad I did. Flying in FPV was soooo much easier than line of sight. All the controls were as you expected (ie you don't have to reverse your controller movements when the quad is flying at you). I had two short 3 minute flights followed by two longer 6 minute flights. On each flight I felt very in control and had zero crashes. Overall a great day.
Some things I noticed were that the yaw control was very very sensitive, and the PID control loop on my flight control was in need of some tuning. Every once in a awhile the quad would start shaking back and forth for a few seconds making it very hard to control. So I think before my next flight I will try to tune the controller a little bit.
Here is a video from one of my flights.
Let the Modifications Begin!
After the first flight I had some modifications I wanted to make in order to improve the quad.

 |
| Added a JST connector and soldered on a new XT60 cable since the old one was cut by the prop |
 |
| Motors in the correct positions now |
 |
| New cable management plan |
 |
| Moved video TX forward by drilling a new hole |
 |
| Battery connector out the back protects the cable from prop strikes |
Completed Modifications
 |
| Added a 10mm white LED in the front and a 3mm red led in the back |
 |
| ESC wires are now coming out the bottom of the quad and then up onto the arms |

 |
| JST connector for 8V to top plate electronics |
 |
| Receiver moved up front |
Thursday, September 17, 2015
Wasp's Maiden Flight
Maiden Flight
On the first flight I accidentally got up to around 200 feet, and that was almost the end of Wasp. Thankfully I was able to get it back down and not crash into a tree. Pretty lucky. The only thing that broke was one prop. After my first crash the dampers were pulled out of the top and bottom plates (basically the dampers got ripped out of the plates), so it is really important to zip tie through all of the dampers.

Quads and a helicopter gathered before we fly
Lessons Learned
- Motors are mounted in wrong arrangement rotate them CW by one position
- Move battery to bottom, print cage
- Move discharge wire out of the way
- Tighten arm bolts
- Focus camera properly
- Adjust PID gains?
- Wire in JST connectors
- Print spare parts
- Buy more props
- Use antenna on headset with correct polarity SMA connector
- Zip tie through all of the dampers
#1
As I mentioned in The Build Part 1 the motors are labeled in a non-intuitive way (labeled CW wrt to the threads, not the rotation of the motor), so I mounted them in the wrong positions, oops. In this orientation the locking nuts on the props will loosen during your flight, eventually the props will come off and you will be flying a rock.
#2
Moving the battery to the bottom of the quad will help make the flight characteristics more stable, and keep it away from the blades (in case you crash and the arms fold in)
#3
I want to reroute the discharge wire to come out the back of the quad. I had a few crashes where the arms folded back in and the still spinning props actually cut the discharge wire, not good.
#4
The arms felt like they folded in too easily, so I want to tighten the bolts.
#5
The camera was out of focus for objects far away. If I want to fly FPV I need to fix that.
#6
All settings were default, so I want to adjust those to improve stability during flight.
#7
I had to solder all the wires directly to each other. I want to replace those connections that can be with JST connectors.
#8
With all the crashing I'm going to need some spare parts.
#9
Definitely will be needing more props.
#10
The antenna on the headset had the wrong polarity, so there was no pin between the antenna SMA and the SMA on the headset.
#11
As I mentioned zip ties through the dampers are really important so that when you crash the plates don't pop off the dampers.
The Build Part 3
Regulator and Camera Installation
This part is pretty easy. I wired up the regulator as per the schematic in The Build Part 1, seen in the picture below mounted on the top plate. I then wired up the video transmitter and video camera. The regulator is set to 8V (the set screw was hot glued in place so it doesn't move during a crash).

Camera and behind that regulator mounted on top plate
To mount the camera you unscrew the lens and tightening nut. Then you insert the lens through the mounting hole and screw it back into the camera. The tricky part is you have to get the focus adjusted so that the tightening screw will actually be tight against the mount and the camera will be focused. I thought I had my camera focused, but it was only focused in my apartment. Once I got outside anything beyond 50 - 75 feet was blurry and this made it very uncomfortable to watch. Wiring the camera to the video transmitter was pretty easy. the yellow wire from the camera (video out) and the yellow wire from the video transmitter were soldered together, and that was it!
See the Ballooning Cost post for the Quad Bill of Materials (BOM) if you want to know what any of the parts are.
Sunday, September 13, 2015
The Build Part 2
Setting up the Turnigy 3-In-1 Battery Monitor, Signal Loss and Lost Airplane Alarm
Follow along with this tutorial to set up the CH5 and AUX switches on your Orange T-Six controller.
Now plug the Turnigy 3-In-1 Battery Monitor, Signal Loss and Lost Airplane Alarm into the gear channel on your receiver (the Gear channel lead from the CC3D flight controller will now be unused). Now you should be able to turn the beeper on with the Gear switch on your Orange T-Six (you may need to perform the controller setup again in GCS and save it to your CC3D board). I am only using Functions 1 and 2.


Wiring Diagram


Included Manual
More Building!

strapping the ESC and RX wires down


Video TX mounting

Top plate and battery mount


Video TX frequency table
I set my video TX to 5820 MHz. If you will be flying with other pilots make sure that your video transmitters are broadcasting on a frequency at least 40 MHz away from the next closets transmitter. Otherwise you will interfere with each others video and most likely crash.
Friday, September 11, 2015
The Build Part 1
Instructions for Hovership MHQ2 can be found here. Skip over the BASE ASSEMBLY: HARDTAIL MOUNTING
Note: You should have the Flight Controller, Receiver, ESCs, Motors, and Power Distribution PCB all wired up before beginning the Setup Wizard.
Useful notes:
EMAX MT2204 motors they are sold in pairs, one clockwise thread for props with a silver prop nut, one counter clockwise thread for props with black prop nuts. Now here is the part that got me, the CW thread shaft, is on a CCW spinning motor! Obviously this makes sense if you think about it, BUT they don't tell you that on every website, and being a newbie I messed that up so my motors are mounted backwards... So in this case the CW in the motor title refers to the threads, not the direction the motor spins.


First I decided to set up the flight controller (openpilot CC3D). Tried to get on the openpilot wiki for the documentation, and guess what? The wiki is down because they couldn't pay the bill... Not looking good for future support on this product...
Thankfully hobbyking did a tutorial on how to set it up.
First download the openpilot ground station here be sure to downloard release 15.02.02. 15.05.02 does not support the CC3D.
Then follow along with the tutorial here
Well obviously things won't work correctly and be easy :(. The CC3D will not upgrade firmware, I keep getting a timeout error. I am using my Mac, so I'll switch to windows and see if that makes a difference. Getting frustrated already with this thing.
The board is working though, I can see data coming back. So this post actually worked to get it connected on my windows 7 laptop
"Perfect thanks.. Plug in card (No GCS) and Right click on start > Control Panel > Hardware and Sound > Devices and Printers And right click on icon copter control Should look like the attached pic) and Remove Device then unplug CC3D
Start GCS > Firmware page click "Upgrade and Erase" plug in card and wait at least 2 min then unplug card and restart GCS and when you plug in the card this time I hope that you going to see the connection and you can run the wizard. Cross fingers and a little pray :)"
Simple instructions
Very surprised and happy that it worked haha.
After that upgrade on the windows 7 machine, it worked as soon as I plugged it into my Mac. Another card failed on my Mac so I repeated the above procedure with it and it worked like a charm. Looks like they have a bug in their ground station software where it will not see the board when you push upgrade if it already is plugged in, but if it is not plugged in and it is waiting for you to plug it in it will work.
When you have successfully updated the firmware you will see a screen like below.

Onto the setup wizard!
Made it to the next screen before I hit another snag. Apparently the OrangeRx R615X uses CPPM not PPM output, and of course the CC3D has PPM, not CPPM as an option. It is unclear if CPPM will work with PPM, so I will have to do some more research. I chose PPM for now.
For multirotor configuration I chose Quadcopter X.
For the ESC setting this page states EMAX SimonK 12A ESC should be set up with 490Hz
Here is my generated connection diagram.


Another challenge has been figuring out how to wire everything up. First thing I learned is that the Electronic Speed Controller I have (EMAX SimonK 12A) has a BEC. What is a BEC you ask? Check this page out. So basically it is a battery eliminator circuit, which in simple terms means that 1) it has a voltage regulator that will drop the battery voltage down to 5V and in my case supply up to 1A to the flight controller or receiver, 2) it will shut power off to the motors when the battery reaches a certain low voltage, but will continue to deliver power to the control surfaces so that you can land your model (this is only useful if you are flying a plane since cutting the power to the motors on a quad will cause it to drop out of the sky like a bat out of hell). Anyway this confirms that I can power the CC3D flight controller off of the ESC.


Note: You should have the Flight Controller, Receiver, ESCs, Motors, and Power Distribution PCB all wired up before beginning the Setup Wizard.
Useful notes:
EMAX MT2204 motors they are sold in pairs, one clockwise thread for props with a silver prop nut, one counter clockwise thread for props with black prop nuts. Now here is the part that got me, the CW thread shaft, is on a CCW spinning motor! Obviously this makes sense if you think about it, BUT they don't tell you that on every website, and being a newbie I messed that up so my motors are mounted backwards... So in this case the CW in the motor title refers to the threads, not the direction the motor spins.

Clockwise Threads (CCW spinning motor!)

Counter-clockwise Threads (CW spinning motor)
First I decided to set up the flight controller (openpilot CC3D). Tried to get on the openpilot wiki for the documentation, and guess what? The wiki is down because they couldn't pay the bill... Not looking good for future support on this product...
Thankfully hobbyking did a tutorial on how to set it up.
First download the openpilot ground station here be sure to downloard release 15.02.02. 15.05.02 does not support the CC3D.
Then follow along with the tutorial here
Well obviously things won't work correctly and be easy :(. The CC3D will not upgrade firmware, I keep getting a timeout error. I am using my Mac, so I'll switch to windows and see if that makes a difference. Getting frustrated already with this thing.
The board is working though, I can see data coming back. So this post actually worked to get it connected on my windows 7 laptop
"Perfect thanks.. Plug in card (No GCS) and Right click on start > Control Panel > Hardware and Sound > Devices and Printers And right click on icon copter control Should look like the attached pic) and Remove Device then unplug CC3D
Start GCS > Firmware page click "Upgrade and Erase" plug in card and wait at least 2 min then unplug card and restart GCS and when you plug in the card this time I hope that you going to see the connection and you can run the wizard. Cross fingers and a little pray :)"
Simple instructions
- start up GCS, DO NOT HAVE CC3D board plugged in
- go to firmware tab
- hit the upgrade and erase button (it will not find the board and give you 20 seconds to plug it in)
- Plug in board before 20 seconds is up
- Board will be recognized and firmware will be upgraded
Very surprised and happy that it worked haha.
After that upgrade on the windows 7 machine, it worked as soon as I plugged it into my Mac. Another card failed on my Mac so I repeated the above procedure with it and it worked like a charm. Looks like they have a bug in their ground station software where it will not see the board when you push upgrade if it already is plugged in, but if it is not plugged in and it is waiting for you to plug it in it will work.
When you have successfully updated the firmware you will see a screen like below.

Onto the setup wizard!
Made it to the next screen before I hit another snag. Apparently the OrangeRx R615X uses CPPM not PPM output, and of course the CC3D has PPM, not CPPM as an option. It is unclear if CPPM will work with PPM, so I will have to do some more research. I chose PPM for now.
For multirotor configuration I chose Quadcopter X.
For the ESC setting this page states EMAX SimonK 12A ESC should be set up with 490Hz
Here is my generated connection diagram.

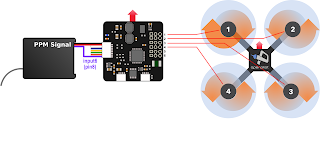
So in the above picture you want to put a CCW thread black prop nut (CW spinning motor) in position 1. Same with position 3. You want to put a CW thread silver prop nut (CCW spinning motor) in positions 2 and 4.
Next I calibrated the sensors.
Well I need the ESCs connected for the next part so I guess I need to build up the quad now.


Jumping back to the CPPM question quick according to the hobbyking video the flight controller will be able to detect CPPM. So hopefully that is the case. At the end of a tutorial they say to use PWM, not PPM. So I used PWM and it worked so I guess PPM might work, but PWM does for sure.
Wiring from Flight Controller to Receiver. Used the following description and picture.
"Yes, that one, first is the plug with 3wires white red and black, signal white to the top of the rx, this goes to throttle, then blue the alei,yellow to elev, green to Rudd, brown to gear and purple to aux, all these must be at the top"

for Orange R615X see wiring pic at end of post
Next I plugged the Flight Controller back into the computer using the USB cable.
Next I need to Bind my Transmitter TX to my Receiver RX. Making sure that the bind jumper is plugged in, if it is not the RX will not turn on, also the CC3D needs to be powered from battery, not from USB. When powered from USB the 5V out to the RX is disabled.
When wiring up the motors you can wire the three motor wires to the three ESC wires in any order, when you check that they are spinning in the right direction as part of the GCS setup wizard if they are spinning in the wrong direction you simply swap any two of the wires and they will spin the opposite way.
One thing that they don't go over is setting up the flight controller offset if you rotated it like I did to have access to the programming port on the side. Adjust the setting in the screen below to whatever rotation you have.

The other setting that you have to be aware of is the flight mode setting. See this post for a description of flight modes. There is a switch on the Orange T-Six transmitter which is mapped to these three flight modes. When the switch is down it is in flight mode 1, middle flight mode 2, up flight mode 3. For a beginner you want to be in flight mode 1.

After setup (arm is set to throttle down and roll right) I tested out the TX and RX and everything worked as it should :).
To arm you have to hold right roll for a few seconds. If you have the ground station software open and connected to the CC3D it will audibly tell you that it is "ARMED"
All other settings were default.
Wiring Up

My wiring schematic
Another challenge has been figuring out how to wire everything up. First thing I learned is that the Electronic Speed Controller I have (EMAX SimonK 12A) has a BEC. What is a BEC you ask? Check this page out. So basically it is a battery eliminator circuit, which in simple terms means that 1) it has a voltage regulator that will drop the battery voltage down to 5V and in my case supply up to 1A to the flight controller or receiver, 2) it will shut power off to the motors when the battery reaches a certain low voltage, but will continue to deliver power to the control surfaces so that you can land your model (this is only useful if you are flying a plane since cutting the power to the motors on a quad will cause it to drop out of the sky like a bat out of hell). Anyway this confirms that I can power the CC3D flight controller off of the ESC.

I rotated my flight controller so that the usb port is facing out the left side of the quad.


I know some people say you have to cut the red wires from the other ESCs so you only power the flight controller from one ESC. Is that necessary? Well if the flight controller board doesn't do something smart then you would have four voltage sources in parallel. As anyone familiar with Kirchoffs Voltage Law knows voltage sources in parallel will violate the law that all voltages around a loop must sum to zero if the voltages are not EXACTLY the same. I'm sure that the ESC voltage regulators do not supply the same voltage, so I really should remove the other three voltage wires. See this post for more discussion on the topic.
Subscribe to:
Posts (Atom)